How to Build a Wooden Mirror Frame: A Step-by-Step Guide
Are you looking to enhance your bathroom decor with a custom wooden mirror frame? Building a wooden mirror frame is not only an excellent DIY woodworking project but also a fantastic way to add a personal touch to your space. In this comprehensive guide, we will walk you through the process of how to make a wooden mirror frame for your bathroom, using the best wood for bathroom mirror frames and helpful framing techniques.
Step-by-Step Guide to Building a Mirror Frame
Follow these steps to create your own beautiful wooden mirror frame:
Step 1: Gather Your Materials
- Wood Selection for Frames: Choose moisture-resistant wood such as cedar, redwood, or treated pine to withstand bathroom humidity.
- Tools: Miter saw, wood glue, clamps, sandpaper, paint or wood stain, and a mounting kit for the mirror.
Step 2: Measure Your Mirror
Start by measuring the dimensions of your mirror accurately. You will need these measurements to ensure your frame fits perfectly.
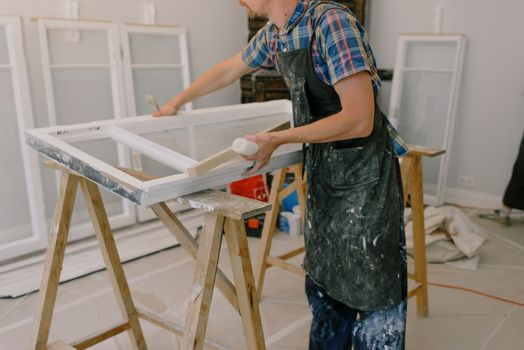
Step 3: Cut the Wood
Using your miter saw, cut four pieces of wood according to the measurements you took. Ensure that the corners are cut at a 45-degree angle for a clean, professional look.
Step 4: Assemble the Frame
Lay out the cut pieces on a flat surface and apply wood glue to the edges. Join the pieces together to form the frame, ensuring that the corners meet tightly. Use clamps to hold the frame in place while the glue dries.
Step 5: Sanding and Finishing Wood
Once the glue has dried, it’s time to sand the frame. Start with a coarse grit sandpaper and progress to a finer grit for a smooth finish. This step is crucial for achieving a polished look, especially if you plan to stain or paint the wood.
Step 6: Apply Finish
Choose a finish that complements your bathroom decor. Whether you prefer a natural wood stain or a painted finish, apply it evenly across the entire frame. Allow it to dry completely.
Step 7: Mounting the Mirror Frame
After finishing, it’s time to mount your mirror inside the frame. Use a mounting kit to secure the mirror to the back of the frame. Ensure it’s firmly in place before hanging it on the wall.
Step 8: Hang Your Mirror Frame
Finally, find the perfect spot in your bathroom and hang your custom wooden mirror frame. Make sure to use the appropriate wall anchors for a secure installation.
Practical Tips for Success
- Consider the mirror frame styles that match your bathroom’s theme.
- For those new to woodworking, this project qualifies as one of the easy woodworking projects for beginners.
- Explore affordable DIY mirror frame ideas—you can even repurpose old wood for a unique look!
FAQs About Wooden Mirror Frames
1. What is the best wood for bathroom mirror frames?
The best wood for bathroom mirror frames includes moisture-resistant options like cedar, redwood, or treated pine, which helps prevent warping and damage.
2. Can I customize the design of my mirror frame?
Absolutely! Custom wooden mirror frame tutorials allow you to personalize the design, shape, and finish to match your bathroom decor perfectly.
3. Are there any special framing techniques I should consider?
Techniques like miter joints, doweling, and biscuit joints can enhance the durability and aesthetic of your mirror frame.
Conclusion
Building a wooden mirror frame for your bathroom is a rewarding DIY project that not only enhances your space but also allows you to express your creativity. With the right materials and techniques, you can create a stunning focal point that complements your bathroom decor. For more woodworking projects, check out DIY wooden towel rack plans or explore resources like Ted's Woodworking for additional inspiration. Happy crafting!
🔨 Want 16,000+ Woodworking Plans?
Ted's Woodworking gives you instant access to over 16,000 step-by-step plans with detailed blueprints, cut lists, and material lists for every project.
Get Instant Access →